


Create and Use Databases
In this lesson, we'll explore the different types of databases available in Notion. Databases are powerful tools for organizing and managing structured data within your workspace.
Add a new database to your Notion page (type "/" and select "Database Inline")
Adding Data Entries:
- Click on an empty cell within the table, or select the "+New" option at the bottom of the table.
- Fill in the relevant information for each field or column within the entry.
- Continue adding data entries by repeating the above steps for each new item.
![]()
Types of Databases
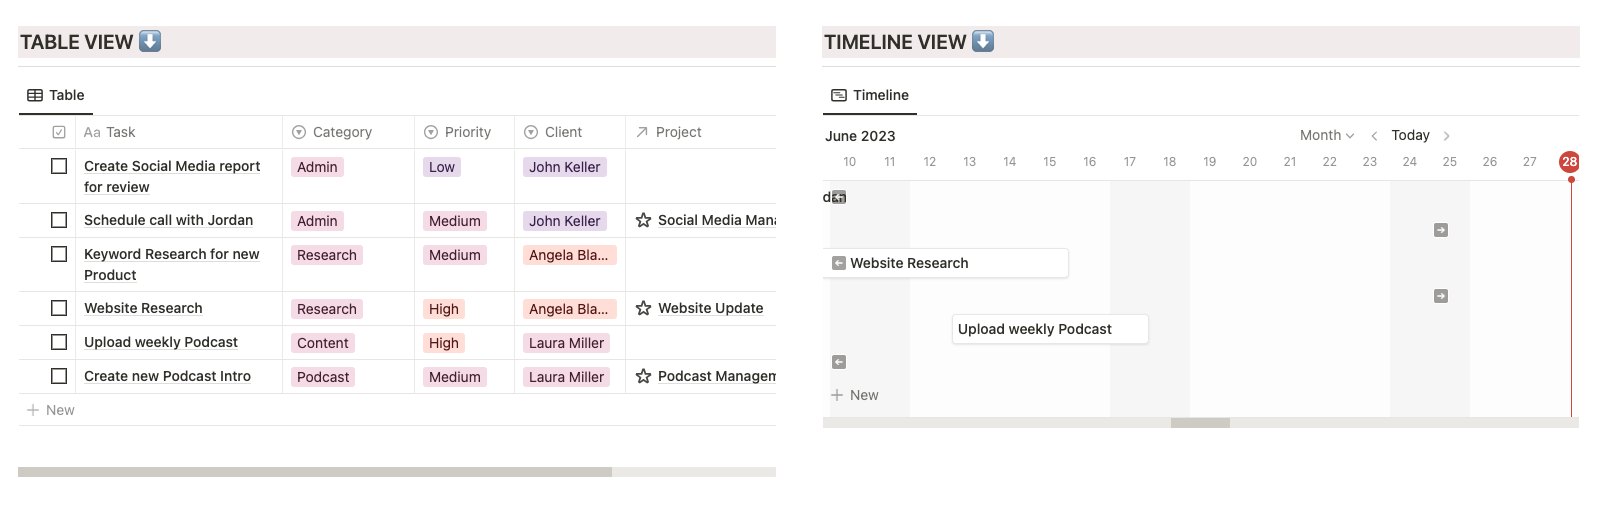
Table View Database:
- create and organize data in a tabular format, similar to a spreadsheet.
- Use table databases to store various types of information, such as project details, inventory lists, or contact information.
Timeline View Database
-
visualize tasks, projects, and events chronologically
-
Customize layouts, color-code labels, and integrate seamlessly. Navigate, zoom, and collaborate for enhanced productivity and project management.
![]()
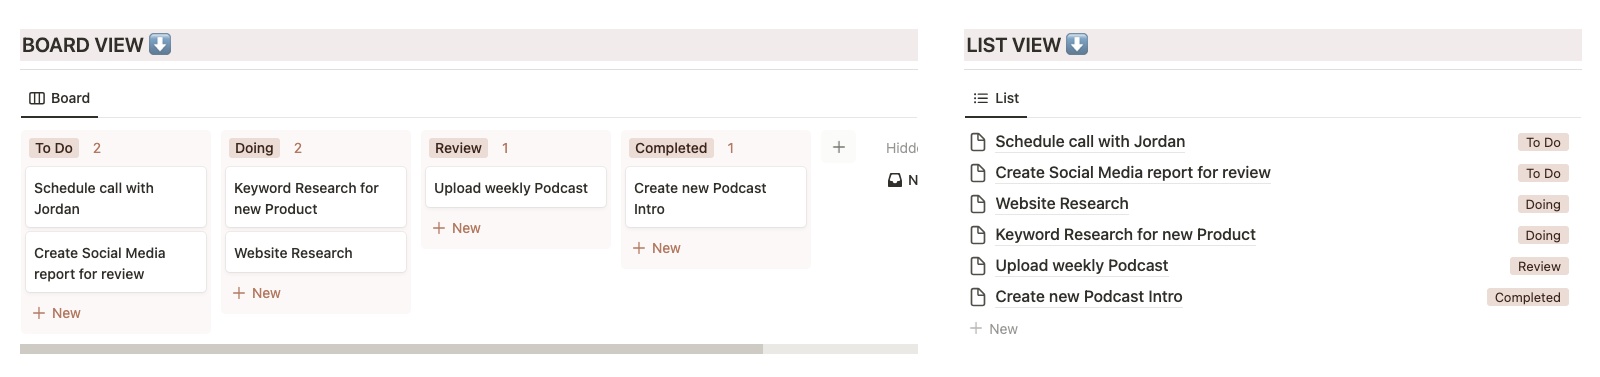
Board View Database:
- visual board with columns representing different stages of a workflow.
- Use Kanban boards to manage tasks, track progress, and visualize the flow of work from start to completion.
List Database:
- present data in a simple, compact list format.
- Use the list database for straightforward lists, such as a to-do list, a reading list, or a list of goals.
![]()
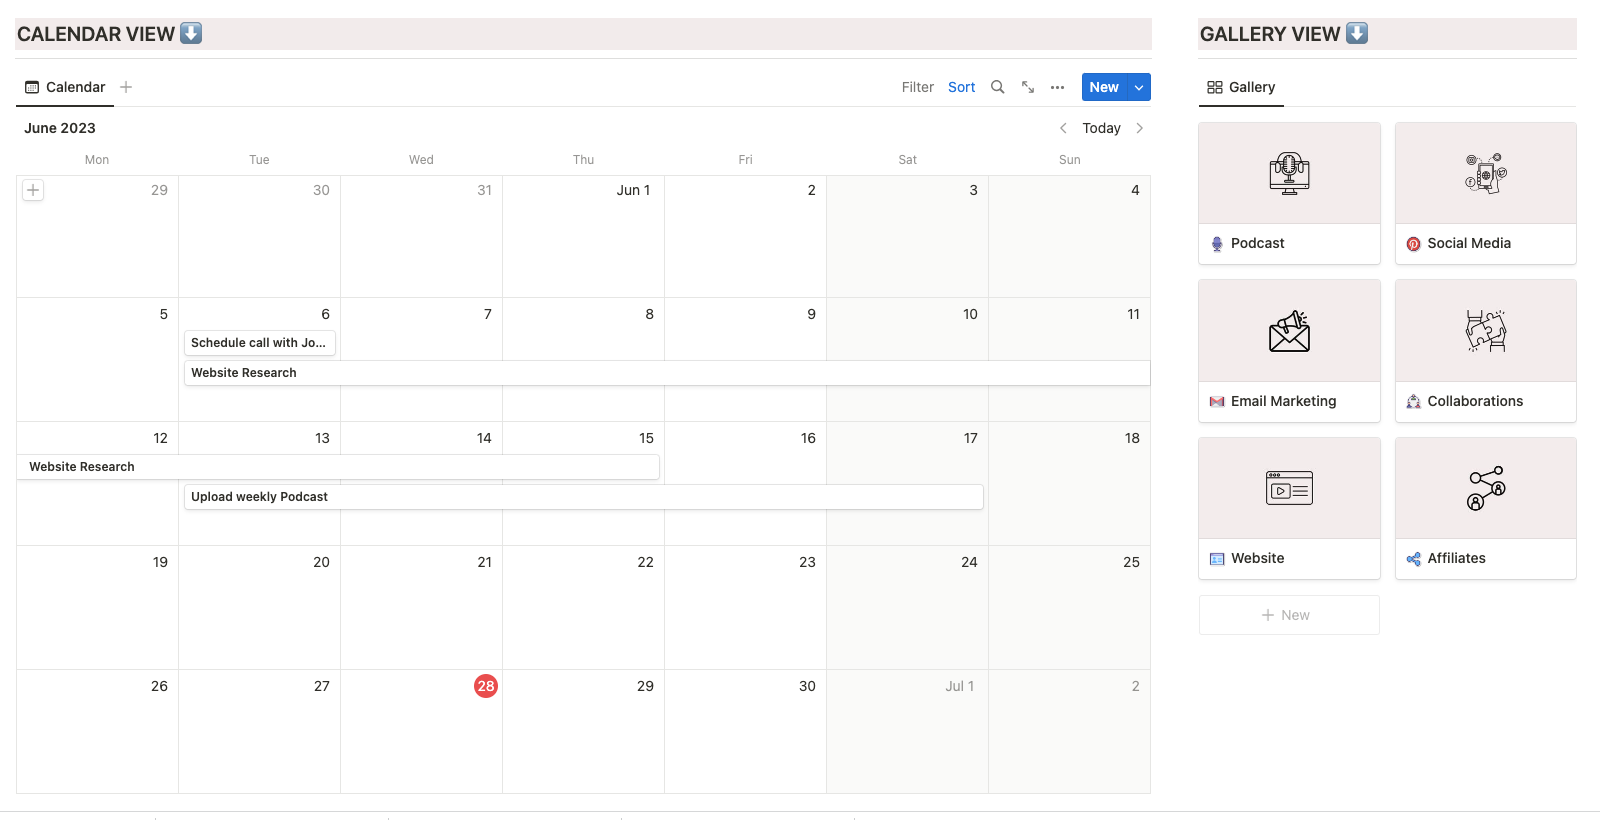
Calendar View Database:
- visualize and manage time-based data in a calendar view.
- Use the calendar database to plan and track events, schedule meetings, or manage project timelines
Gallery Database:
- present data in a visual gallery or card view, making it ideal for displaying media-rich content.
- Use the gallery database to showcase images, designs, or product catalogs.
![]()
Database Properties
Add properties to your database items to give them context and organize your data. Then use these properties to filter, sort, and search your data. Here are some key properties you can use:
-
Text: Use this property to store any type of textual information, such as names, descriptions, or notes.
-
Number: Ideal for storing numerical values like quantities or ratings.
-
Select: This property allows you to create predefined options or categories. Choose from a dropdown menu to categorize your data
-
Multi-select: Dropdown menu of tags letting you add more than one at a time.
-
Status: Dropdown menu of tags that are grouped by status (i.e. To-do, In Progress, Complete)
-
Date: Use the date property to track deadlines (due dates), events, or any time-related information.
-
Files & media: Allows you to upload any files relevant to your database item.
-
Checkbox: Use checkboxes to mark tasks as completed, track progress, or indicate any yes/no situations.
-
URL: Accepts a link to a website relevant to your database item.
-
Relation (more advanced): Establish relationships between different databases or pages by linking related items. Use this property to create connections and access relevant information quickly.
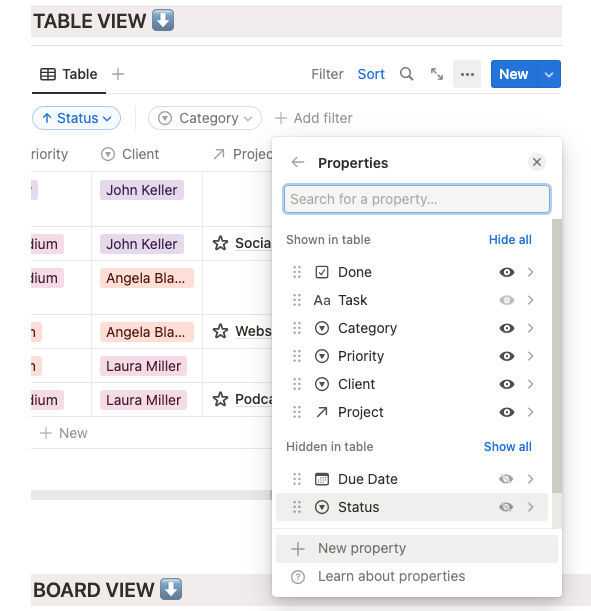
To add a new property click the ••• icon at the top right and choose the 'Properties' option toward the top right of your database. It will show you your current properties and gives you the option to add a new property ('+New Property'). This will bring up a menu where you can name your property and select what type to use
![]()
Organize Database Content
By understanding how to organize data entries within Notion databases, you can effectively manage and structure your information.
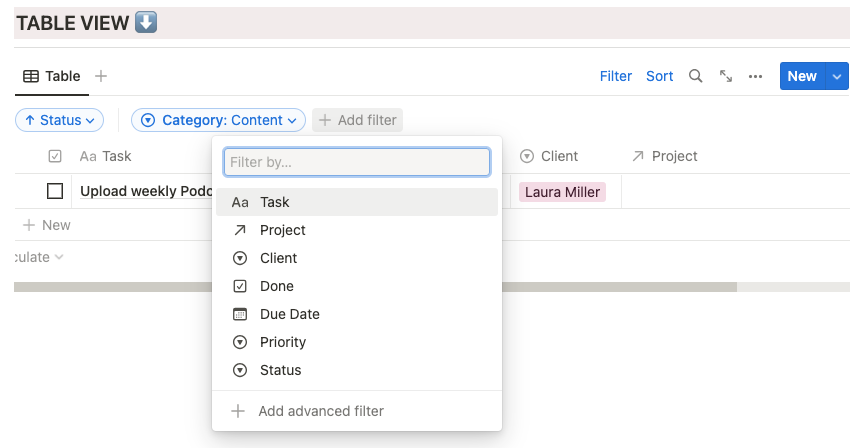
Filter Database Content:
- Click on the "Filter" button located at the top right of your database.
- Define "Filter by" conditions based on column values, such as text, checkboxes, dates, or tags.
- Apply multiple filters to narrow down the displayed content and focus on specific criteria.
- Clear filters to return to the full view of your database.
The table below is set up to only show entries that have 'Content' in the Category property.
![]()
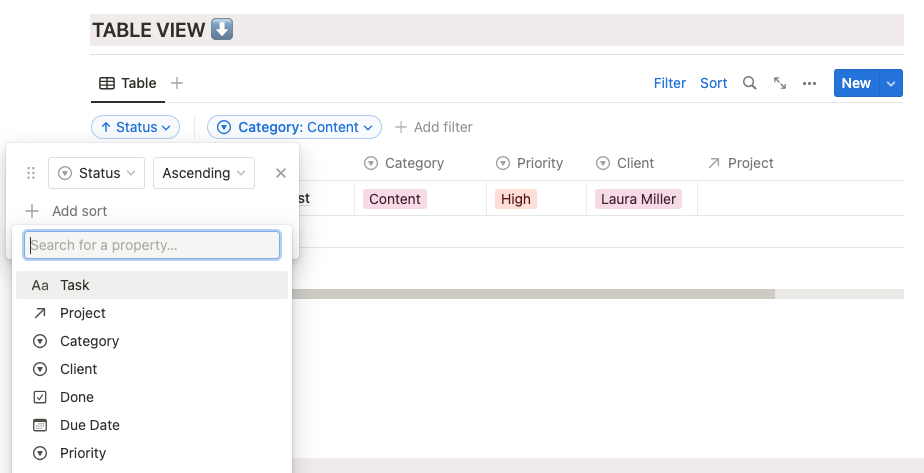
Sort Database Content:
-
Click "Sort" at the top right of your database.
-
Choose the property you'd like to sort by from the dropdown menu.
-
Click it to edit the ascending/descending sorting.
![]()
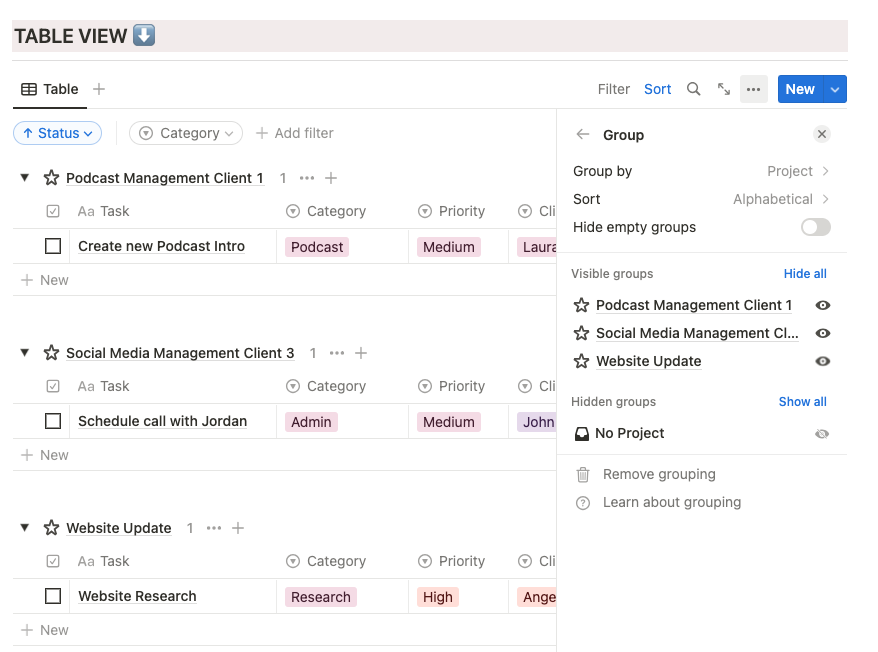
Group Database Content:
- Click on the ••• menu to find the Group option
- Specify what property you want your database to be grouped by
- The database will be organized into groups based on the chosen column, creating sections that visually group related data entries together.
- Expand or collapse groups to reveal or hide the entries within each group.
You can combine filtering, sorting, and grouping to create advanced views of your database. For example, you can filter tasks with a specific status, sort them by priority, and group them by project to get a comprehensive overview of your projects and tasks.

Other Available Products


